
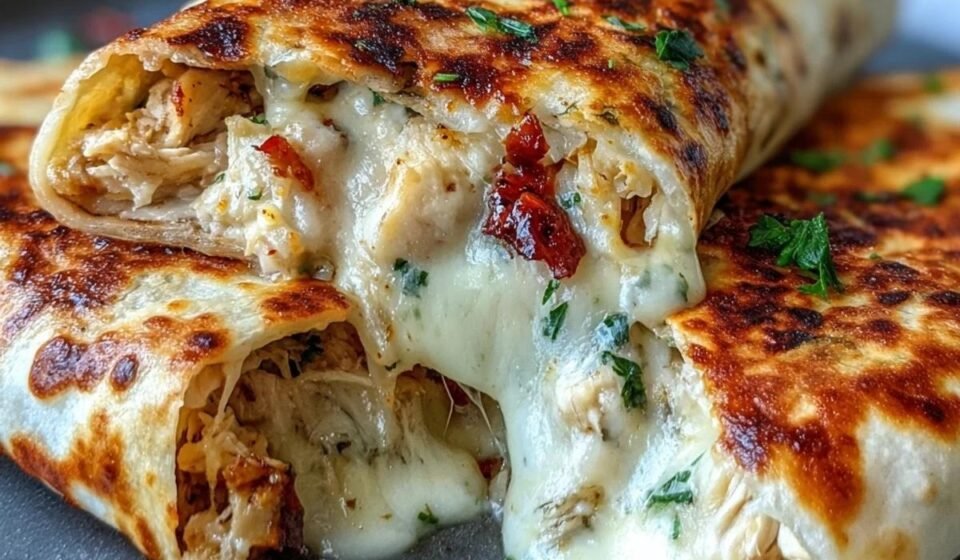

High-Protein Cheesy Garlic Chicken Roll-Ups
These High-Protein Cheesy Garlic Chicken Roll-Ups are crispy on the outside, tender on the inside, and loaded with juicy chicken, melted cheese, and delicious garlic flavor. Made with low-carb wraps and a creamy cheesy filling, they’re perfect for a quick dinner, meal prep, or a satisfying post-workout meal.
Prep Time: 15 minutes Cook Time: 15 minutes Total Time: 30 minutes Servings: 4 roll-ups
Ingredients
For the Chicken Filling
- 500 g (1.1 lb) boneless, skinless chicken breast, cooked and shredded
- 1 cup (100 g) shredded mozzarella cheese
- ½ cup (50 g) shredded cheddar cheese
- 2 tablespoons cream cheese, softened
- 3 garlic cloves, minced
- 1 tablespoon olive oil
- ½ teaspoon paprika
- ½ teaspoon Italian seasoning
- ½ teaspoon onion powder
- Salt and black pepper, to taste
- 2 tablespoons chopped fresh parsley
For the Wraps
- 4 small low-carb tortillas or protein wraps
- 1 teaspoon olive oil or melted butter, for brushing
- ¼ teaspoon garlic powder
- 2 tablespoons grated Parmesan cheese, optional
Instructions
1. Prepare the chicken
- Cook the chicken breast in a skillet or boil until the internal temperature reaches 165°F (74°C).
- Allow it to cool slightly, then shred it using two forks.
- If using leftover cooked chicken, ensure it is properly refrigerated and reheated thoroughly.
2. Make the garlic chicken filling
- Heat 1 tablespoon olive oil in a skillet over medium heat.
- Add the minced garlic and cook for 30–60 seconds until fragrant.
- Add the shredded chicken, paprika, Italian seasoning, onion powder, salt, and black pepper.
- Stir well and cook for 2–3 minutes so the chicken absorbs the garlic and seasonings.
- Reduce the heat to low. Add the cream cheese and stir until creamy.
- Fold in the mozzarella, cheddar, and chopped parsley until the filling is evenly combined.
3. Fill the wraps
- Lay the low-carb tortillas flat on a clean surface.
- Divide the cheesy chicken mixture evenly among the four wraps.
- Spread the filling down the center of each tortilla, leaving space at the edges.
- Fold in the sides and roll each tortilla tightly to seal the filling inside.
4. Add the garlic coating
- Mix the melted butter or olive oil with the garlic powder.
- Lightly brush the outside of each roll-up with the mixture.
- Sprinkle with grated Parmesan cheese if desired for an extra savory crust.
5. Cook until golden and crispy
Skillet method:
- Heat a nonstick skillet over medium heat.
- Place the roll-ups seam-side down.
- Cook for 2–3 minutes per side, turning carefully, until golden brown and crispy.
Air fryer method:
- Preheat the air fryer to 375°F (190°C).
- Arrange the roll-ups in a single layer and lightly spray with oil.
- Air-fry for 6–9 minutes, turning halfway through, until golden and crisp.
6. Serve
Allow the roll-ups to rest for 2 minutes before slicing. Serve warm with a side of garlic yogurt sauce, a fresh green salad, or steamed broccoli.
Estimated Nutrition Information
Per roll-up, using low-carb tortillas and divided into 4 servings. Values vary by brand.
| Nutrient | Approximate amount |
|---|---|
| Calories | 380–460 |
| Protein | 45–55 g |
| Total carbohydrates | 8–14 g |
| Fiber | 4–8 g |
| Net carbohydrates | 4–8 g |
| Fat | 18–25 g |
Tips for the Best Chicken Garlic Wraps
- For extra protein: Use chicken breast and protein-rich, low-carb tortillas.
- For maximum crispiness: Avoid overfilling the wraps and cook them seam-side down first.
- For a spicy version: Add chili flakes or a pinch of cayenne pepper.
- For meal prep: Prepare the chicken filling in advance and assemble the wraps just before cooking.
- For a lighter version: Reduce the cheddar and cream cheese slightly, and serve with a yogurt-based garlic dip.