
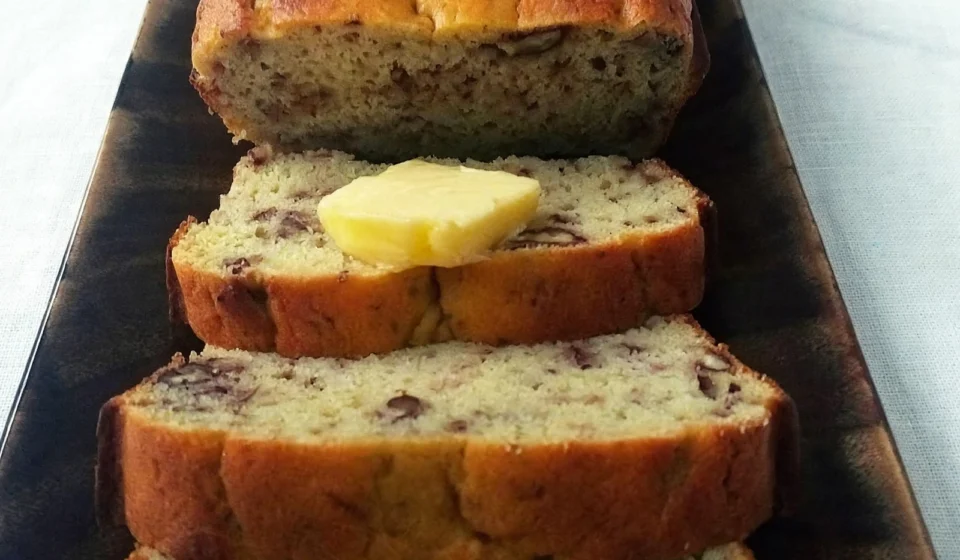

🍞 High-Protein Keto Bread
Soft, tender, and sturdy enough for sandwiches, this homemade keto bread has a mild flavor without the strong eggy taste common in many low-carb breads. It’s also delicious toasted with butter and makes an excellent high-protein option for breakfast or lunch.
Servings: 12 slices
Prep Time: 15 minutes
Bake Time: 35–45 minutes
Total Time: About 1 hour
Ingredients
- 1½ cups finely ground blanched almond flour
- ½ cup unflavored whey protein powder
- ¼ cup coconut flour
- 1 tbsp psyllium husk powder
- 1½ tsp baking powder
- ½ tsp xanthan gum
- ½ tsp salt
- 4 large eggs, room temperature
- ¼ cup unsalted butter, melted and slightly cooled
- ½ cup unsweetened almond milk
- 1 tbsp apple cider vinegar
- 1 tsp olive oil or melted butter, for greasing the pan
Instructions
1. Prepare the oven
Preheat your oven to 350°F (175°C).
Line an approximately 8×4-inch loaf pan with parchment paper, leaving some overhang for easy removal. Lightly grease the parchment.
2. Combine the dry ingredients
In a large bowl, whisk together:
- Almond flour
- Whey protein powder
- Coconut flour
- Psyllium husk powder
- Baking powder
- Xanthan gum
- Salt
Break up any lumps so the finished bread has an even texture.
3. Mix the wet ingredients
In a separate bowl, whisk the eggs until smooth.
Add the melted butter, almond milk, and apple cider vinegar. Whisk until thoroughly combined.
The apple cider vinegar helps create a lighter texture and also helps reduce the noticeable egg flavor.
4. Make the batter
Pour the wet mixture into the dry ingredients.
Stir gently with a spatula until everything is incorporated. Don’t overmix.
The batter will become fairly thick as the coconut flour and psyllium absorb moisture.
Let it rest for 2–3 minutes.
If it becomes excessively thick or difficult to spread, mix in another tablespoon of almond milk.
5. Fill the loaf pan
Transfer the batter to the prepared pan.
Smooth the top with a spatula. For a more attractive loaf, gently round the center rather than leaving the top completely flat.
6. Bake
Bake for 35–45 minutes, or until the loaf is golden on top and a toothpick inserted into the center comes out mostly clean.
If the top begins browning too quickly, loosely cover it with foil during the final 10–15 minutes.
7. Cool completely
Remove the bread from the oven and allow it to cool in the pan for about 10 minutes.
Lift it out using the parchment and place it on a wire rack.
Let it cool completely before slicing. This is important because the interior continues to set as it cools.
8. Slice and serve
Once completely cool, slice into 12 even slices.
Serve fresh with butter, use it for sandwiches, or toast it until lightly crisp.
Storage
- Room temperature: 1–2 days in an airtight container
- Refrigerator: Up to 5–7 days
- Freezer: Up to 2–3 months
For freezing, place parchment between individual slices and store them in a freezer-safe bag. Toast directly from frozen when ready to eat.
High-Protein & Keto Tips
For the best protein content, use a low-carb whey protein isolate with minimal added carbohydrates.
The exact nutrition will vary by brands and slice size, but with 12 slices this recipe can provide roughly 10–12 g protein per slice while keeping carbohydrates low.
Important: The claimed 2 g net carbs per slice should be verified using the exact brands of almond flour, coconut flour, protein powder, and other ingredients you use.
Tip: For the best sandwich texture, let the bread cool completely before slicing and toast it lightly rather than overbaking it.